Google Web开发最佳实践(一)

这篇文章最初是在阿里通信前端团队的github博客(http://aliqin.github.io)上看到的,原文地址https://developers.google.com/web/fundamentals/(要翻墙)。既然要去阿里了,就得先熟悉熟悉环境,既然是最佳实践,就得自己亲自实践一下。
1.创建网站的内容和结构
1.1创建页面结构
- 一块描述我们高级产品 —“CS256:移动Web开发”教程的区域
- 一个表单,用于收集对我们产品感兴趣用户的信息
- 一段深入描述,以及视频
- 一些实际课程产品中的图片
- 一个数据表格,用来支持产品理念的信息
    <!doctype html>
    <html>
      <head>
         <meta name="viewport" content="width=device-width, initial-scale=1.0">
         <title>CS256: Mobile Web development - structure</title>
      </head>
      <body>
        <div id="headline">
          <header>
            <h1></h1>
            <p></p>
          </header>
          <div id="blurb">
            <p></p>
            <ul>
              <li>
            </ul>
          </div>
          <form method="post" id="register">
          </form>
        </div>
        <div id="section1">
          <h2></h2>
          <p></p>
          <ul>
            <li>
          </ul>
          <video></video>
        </div>
        <div id="section2">
          <h2></h2>
          <p></p>
          <div id="images">
            <img>
          </div>
        </div>
        <div id="section3">
          <h2></h2>
          <p></p>
        </div>
        <footer>
          <p></p>
        </footer>
          </body>
</html>1.2向网站添加内容
创建标题和表单
    <div id="headline">
      <div class="container">
        <header>
          <h1>Mobile Web Development</h1>
          <p>Building Mobile Web Experiences</p>
        </header>
        <div id="blurb">
          <p>So you've heard mobile is kind of a big deal, and you're not
          sure how to transform your traditional desktop-focused web apps
          into fast, effective multi-device experiences.</p>
          <p>This course is designed to teach web developers what
          they need to know to create great cross-device web
          experiences.</p>
          <p>This course will focus on building mobile-first web apps,
          which will work across multiple platforms including:</p>
          <ul>
            <li>Android,</li>
            <li>iOS,</li>
            <li>and others.</li>
          </ul>
        </div>
        <form method="post" id="register">
        </form>
      </div>
    </div>
我们还需要填充表单。表单简易,用于搜集用户的名字、电话、回他们电话的恰当时间。 所有的表单应该具有标签和placeholders(预期值的提示信息),以便于用户聚焦相应的元素,了解往其中应该填写的内容,还有利于协助工具理解表单结构。名称属性不仅用于把表单值传输到服务器,还用于浏览器针对用户如何自动填写表单问题上给出重要提示。 我们还添加了语义类型,使得用户能够更快、更简单地在移动设备上输入内容。例如,当输入电话号码时,拨号键盘应恰好呈现在用户眼前。
创建视频和信息区域
    <div id="section1">
      <div class="container">
        <h2>What will I learn?</h2>
        <p>After completing this class, you'll have built a web application with a first-class mobile experience.</p>
        <p>You'll understand what it takes to:</p>
        <ul>
          <li>build great web experiences on mobile devices</li>
          <li>use the tools you need to test performance</li>
          <li>apply your knowledge to your own projects in the future</li>
        </ul>
        <video controls poster="udacity.png">
          <source src="udacity.mp4" type="video/mp4"></source>
          <source src="udacity.webm" type="video/webm"></source>
          <p>Sorry your browser doesn't support video.
             <a href="udacity.mov">Download the video</a>.
          </p>
        </video>
        <br>
      </div>
</div>视频在叙述内容时,通常交互性更强,因此经常用来展示产品或概念演示。跟随以下最佳实践,你能轻松把视频整合到网站上:
- 添加 controls 属性,让用户轻松播放视频。
- 添加 poster 图片,让用户预览到内容。
- 根据所支持的视频格式添加多个 <source> 元素。
- 添加备选文本,如果用户在窗口中无法播放视频,就让他们下载。
创建图片区域
- 内容图片 — 内联在文档中,用于传达内容的额外信息。
- 样式图片 — 用于点缀站点,让站点更好看的图片;通常是背景图片,图案和渐变。
    <div id="section2">
      <h2>Instructors</h2>
      <p>The worlds leading mobile autorities</p>

      <div id="images">
        <img src="chriswilson.png" alt="Chris Wilson: Course Instructor">
        <img src="peterlubbers.png" alt="Peter Lubbers: Course Instructor">
        <img src="seanbennett.png" alt="Sean Bennet: Course Developer">
      </div>

      <br>
</div>图片设置成与屏幕宽度一样宽。这个设置在移动设备上行之有效,但在桌面程序中表现平平。我们将在响应式设计部分讲述这个问题。在添加 alt 标签时,请确保你的 alt 文本跟完整描述图片一样精确。比如在我们的示例中,我们给 alt 属性添加的是 “Name: Role”,这给了用户足够信息,知道这是关于作者,以及他们的职业。
添加数据列表部分
最后一部分是简单的表格,用于列出产品的详细统计数据。 表格仅限用于列表示资料,如信息矩阵。 <div id="section3">
<h2>Mobile. Why should I care?</h2>
<p>It is huge. Everywhere.</p>
<table>
<caption>
<p>Data from <a href="http://gs.statcounter.com/#desktop+mobile+tablet-comparison-ww-monthly-201303-201403">StatsCounter</a></p>
</caption>
<thead>
<tr>
<th>Country</th>
<th>Desktop share</th>
<th>Tablet share</th>
<th>Mobile share</th>
</tr>
</thead>
<colgroup>
<col span="1">
<col span="1">
<col span="1">
<col span="1">
</colgroup>
<tbody>
<tr>
<td data-th="Country"><a href="http://gs.statcounter.com/#desktop+mobile+tablet-comparison-IN-monthly-201303-201403">India</a></td>
<td data-th="Desktop share">32%</td>
<td data-th="Tablet share">1%</td>
<td data-th="Mobile share">67%</td>
</tr>
<tr>
<td data-th="Country"><a href="http://gs.statcounter.com/#desktop+mobile+tablet-comparison-GB-monthly-201303-201403">GB</a></td>
<td data-th="Desktop share">69%</td>
<td data-th="Tablet share">13%</td>
<td data-th="Mobile share">18%</td>
</tr>
<tr>
<td data-th="Country"><a href="http://gs.statcounter.com/#desktop+mobile+tablet-comparison-US-monthly-201303-201403">US</a></td>
<td data-th="Desktop share">69%</td>
<td data-th="Tablet share">9%</td>
<td data-th="Mobile share">22%</td>
</tr>
<tr>
<td data-th="Country"><a href="http://gs.statcounter.com/#desktop+mobile+tablet-comparison-CN-monthly-201303-201403">China</a></td>
<td data-th="Desktop share">86%</td>
<td data-th="Tablet share">4%</td>
<td data-th="Mobile share">10%</td>
</tr>
</tbody>
</table>
<br>
</div>
添加一个页脚
大部分网站都需要一个页脚,显示一些条款声明及其他不该放入页面主要导航部分或主要内容区域的东西。我们的站点上,我们链接一个条款声明,一个联系页面,以及我们的社交媒体资料。
<footer>
      <div class="container">
        <p>We always need a footer.</p>
      </div>
    </footer>
我们已经创建好了网站的大纲,确定了全部的主要框架元素。我们确信所有相关内容已经准备妥当,以满足我们业务的需求。
2.让网站支持响应式布局
2.1添加一个 viewport
<meta name="viewport" content="width=device-width, initial-scale=1.0">
2.2应用简单的样式
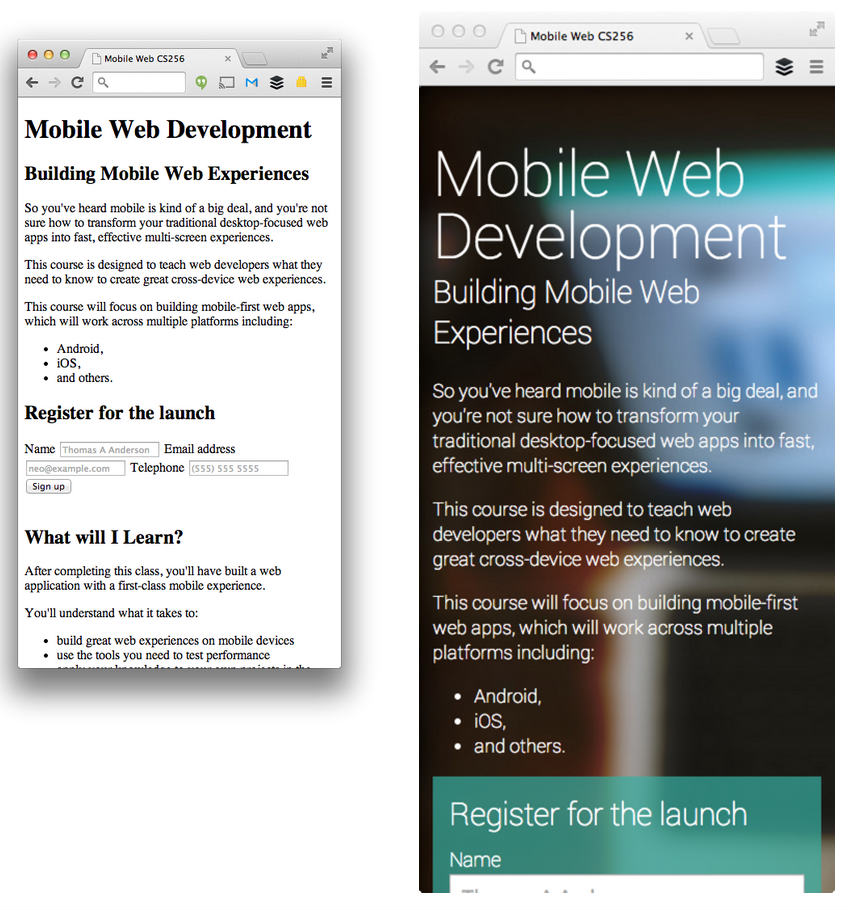
google的样式指南,提供了一个非常具体的品牌、字体指导方针。 样式指南是深入认识页面的可视化表达的有效途径,它有助于确保设计首尾风格一致。比如对于颜色的使用:

在上一节中,我们添加了所谓的“内容图片”。这些图片对于描述我们产品很重要。样式图片不是核心内容的一部分,但增添了视觉冲击力,或引导用户注意力至特定内容。 这方面的一个很好的例子是:顶部内容的标题图片。它经常被用来吸引用户阅读更多的产品。 它们可以非常简单地包含进来。在我们的例子中,样式图片为背景,应用简单的css即可。
#headline {
  padding: 0.8em;
  color: white;
  font-family: Roboto, sans-serif;
  background-image: url(backgroundimage.jpg);
  background-size: cover;
}

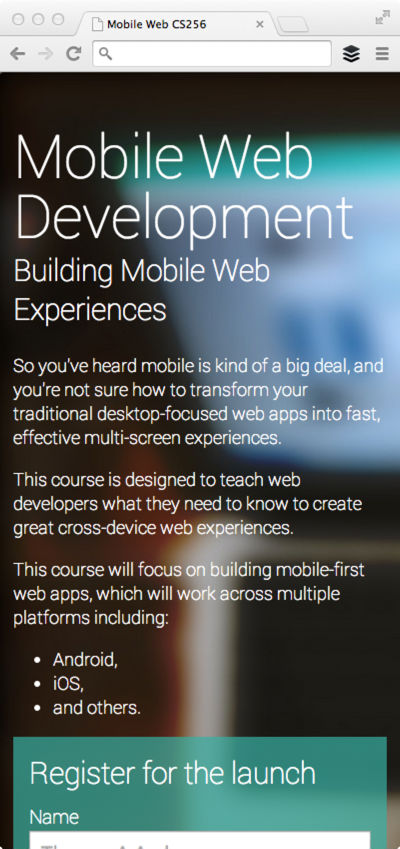
我们选了一张简单的背景图,图片模糊过,不至于把内容比下去,我们让它 cover 整个元素;这样它会伸展开来,同时保持正确的纵横比。
2.3设置第一个断点
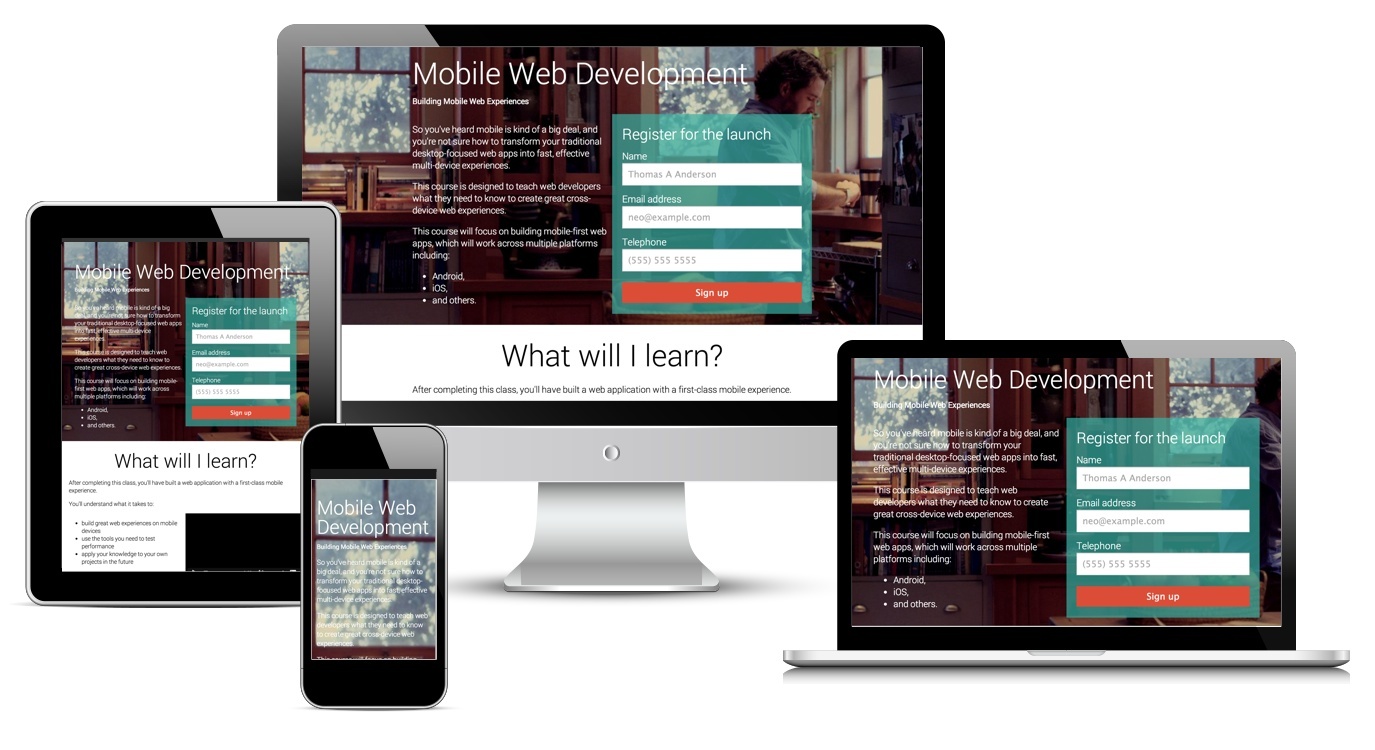
当宽度大约为600px时,设计开始变得糟糕。在我们的例子中,行的长度会超过10个字(最佳的阅读长度),而这正是我们需要调整的地方。 600px似乎是我们创建第一个临界点的良好位置,因为它确定了范围,重新定位元素,使之更好地适应屏幕。我们用Media Queries来设定指定样式:
@media (min-width: 600px) {
<span style="white-space:pre">	</span>//your css for >600px width devices
}
更大的屏幕上,有更多的空间,内容的摆放也就有更多的自由度。我们需要:
- 限制设计的最大宽度。
- 修改元素的内边距,减小文字大小。
- 浮动表单,使它跟页头内容并排。
- 让视频浮动起来,内容环绕。
- 缩小图片尺寸,在一个更佳的网格中显示。
2.4限制设计的最大宽度
我们仅选择两大布局:窄视口和宽视口:这大大简化了构建过程。 我们决定,在窄视口中创建全幅部分,并且在宽视口中仍保持全幅。这意味着我们应限制屏幕的最大宽度,使得文本、段落不延伸成一长单行,出现超宽屏幕。我们选择800px作为最大值。
为了实现这个目标,我们需要限制宽度,并将元素置于中心。在每个主要区域中,我们需要创建一个容器,将其外边距(margin)设为auto。这允许屏幕增大,但内容仍处于中心,最大尺寸为800px。代码就不贴了。
2.5修改元素的内边距,减小文字大小
#headline { padding: 20px 5%; }2.6调整元素,适应宽视口
窄视口以线性方式堆叠显示。每个主要区域及其里面的内容是依次从上到下排列。 宽视口提供了额外的空间,使得内容能以最佳方式呈现在屏幕上。对于我们的产品页面,根据信息架构(IA),意味着我们可以:
- 移动表单,贴近头标题信息
- 将视频放在重要功能列表右边
- 平铺图像
- 展开表格
浮动表单元素
#headline #blurb {
  float: left;
  font-weight: 200;
  width: 50%;
  font-size: 18px;
  box-sizing: border-box;
  padding-right: 10px;
}

#headline #register {
  float:right;
  padding: 20px;
  width: 50%;
  box-sizing: border-box;
  font-weight: 300;
}

#headline br {
  clear: both;
}

#headline {
  padding: 20px 5%;
}
使视频元素浮动
#section1 ul {
  box-sizing: border-box;
  float: left;
  width: 50%;
  padding-right: 1em;
}

#section1 video {
  width: 50%;
  float: right;
}
平铺图片
#section2 div img {
   width: 30%;
   margin: 1%;
   box-sizing: border-box;
   border-radius: 50% 50%;
   box-shadow: black 0px 0px 5px;
 }
让图片自适应DPI
数据表格
@media screen and (max-width: 600px) {
  table thead {
    display: none;
  }

  table td {
    display: block;
    position: relative;
    padding-left: 50%;
    padding-top: 13px;
    padding-bottom: 13px;
    text-align: left;
    background: #e9e9e9;
  }

  table td:before {
    content: attr(data-th) " :";
    display: inline-block;
    color: #000000;
    background: #e9e9e9;
    border-right: 2px solid transparent;
    position: absolute;
    top: 0;
    left: 0;
    bottom: 0;
    width: 33%;
    max-height: 100%;

    font-size: 16px;
    font-weight: 300;
    padding-left: 13px;
    padding-top: 13px;
  }
}
2.7尾声
- 写代码之前,创建一个基本的信息架构和清楚需要的内容
- 总是设置一个视口
- 移动优先,形成基本的经验
- 一旦拥有移动经验,增加显示器的宽度,直到网页看起来不合适,并在此设置临界点
- 不断迭代
郑重声明:本站内容如果来自互联网及其他传播媒体,其版权均属原媒体及文章作者所有。转载目的在于传递更多信息及用于网络分享,并不代表本站赞同其观点和对其真实性负责,也不构成任何其他建议。


