tooltip 鼠标移动上去出现图片或文字与title大同小异
代码如下:
<script type="text/javascript" src="jquery-1.3.2.min.js"></script>
<script type="text/javascript" src="jquery.qtip-1.0.0-rc3.min.js"></script>
下面举几个比较简单的例子。
1、Basic text
html如下所示:
<div id="content">
<a href=" ">Basic text</a>
</div>
JS代码:
<script type="text/javascript">
$(document).ready(function()
{
$(‘#content a[href]‘).qtip(
{
content: ‘Some basic content for the tooltip‘
});
});
</script>
效果如图所示: 
2、Title attribute
html如下所示:
<div id="content">
<a href=" " title="That sounds familiar...">Title attribute</a>
</div>
JS代码:
<script type="text/javascript">
$(document).ready(function()
{
$(‘#content a[href][title]‘).qtip({
content: {
text: false
},
style: ‘cream‘
});
});
</script>
效果如图所示: 
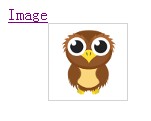
3、Image
html如下所示:
<div id="content">
<a href=" ">Image</a>
</div>
JS代码:
<script type="text/javascript">
$(document).ready(function()
{
$(‘#content a[href]‘).qtip({
content: ‘<img src="small.png" alt="Image" />‘
});
});
</script>
效果如图所示: 
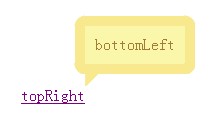
4、Corner values
html如下所示:
<div id="content" style="margin-top:200px;margin-left:200px;">
<a href=" ">Corner values</a>
</div>
JS代码:
<script type="text/javascript">
var corners = ‘bottomLeft‘;
var opposites = ‘topRight‘;
$(document).ready(function()
{
$(‘#content a‘)
.hover(function()
{
$(this).html(opposites)
.qtip({
content: corners,
position: {
corner: {
tooltip: corners,
target: opposites
}
},
show: {
when: false,
ready: true
},
hide: false,
style: {
border: {
width: 5,
radius: 10
},
padding: 10,
textAlign: ‘center‘,
tip: true,
name: ‘cream‘
}
});
});
});
</script>
效果如图所示: 
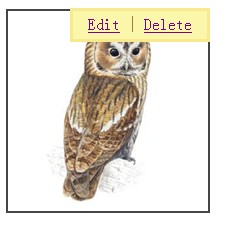
5、Fixed tooltips
html如下所示:
<div id="content">
<img src="sample.jpg" height="200" />
</div>
JS代码:
<script type="text/javascript">
$(document).ready(function()
{
$(‘#content img‘).each(function()
{
$(this).qtip(
{
content: ‘<a href=" ">Edit</a> | <a href=" ">Delete</a>‘,
position: ‘topRight‘,
hide: {
fixed: true
},
style: {
padding: ‘5px 15px‘,
name: ‘cream‘
}
});
});
});
</script>
css代码:
<style type="text/css">
#content img{
float: left;
margin-right: 35px;
border: 2px solid #454545;
padding: 1px;
}
</style>
效果如图所示: 
6、Loading html
html如下所示:
<div id="content">
<a href="#" rel="sample.html">Click me</a>
</div>
JS代码:
Js代码
<script type="text/javascript">
$(document).ready(function()
{
$(‘#content a[rel]‘).each(function()
{
$(this).qtip(
{
content: {
url: $(this).attr(‘rel‘),
title: {
text: ‘Wiki - ‘ + $(this).text(),
button: ‘Close‘
}
},
position: {
corner: {
target: ‘bottomMiddle‘,
tooltip: ‘topMiddle‘
},
adjust: {
screen: true
}
},
show: {
when: ‘click‘,
solo: true
},
hide: ‘unfocus‘,
style: {
tip: true,
border: {
width: 0,
radius: 4
},
name: ‘light‘,
width: 570
}
})
});
});
</script>
效果如图所示: 
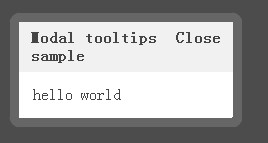
7、Modal tooltips
html如下所示:
<div id="content">
<a href="#" rel="modal">Click here</a>
</div>
JS代码:
<script type="text/javascript">
$(document).ready(function()
{
$(‘a[rel="modal"]:first‘).qtip(
{
content: {
title: {
text: ‘Modal tooltips sample‘,
button: ‘Close‘
},
text: ‘hello world‘
},
position: {
target: $(document.body),
corner: ‘center‘
},
show: {
when: ‘click‘,
solo: true
},
hide: false,
style: {
width: { max: 350 },
padding: ‘14px‘,
border: {
width: 9,
radius: 9,
color: ‘#666666‘
},
name: ‘light‘
},
api: {
beforeShow: function()
{
$(‘#qtip-blanket‘).fadeIn(this.options.show.effect.length);
},
beforeHide: function()
{
$(‘#qtip-blanket‘).fadeOut(this.options.hide.effect.length);
}
}
});
$(‘<div id="qtip-blanket">‘)
.css({
position: ‘absolute‘,
top: $(document).scrollTop(),
left: 0,
height: $(document).height(),
width: ‘100%‘,
opacity: 0.7,
backgroundColor: ‘black‘,
zIndex: 5000
})
.appendTo(document.body)
.hide();
});
</script>
效果如图所示: 
--------------------------------------------------------------------------------------------------------------------------------------
w3c实例
<!doctype html>
<html>
<head>
<meta charset="utf-8">
<title>jQuery Tooltip 插件</title>
<link rel="stylesheet" href="http://jquery.bassistance.de/tooltip/jquery.tooltip.css" />
<link rel="stylesheet" href="http://jquery.bassistance.de/tooltip/demo/screen.css" />
<script src="http://jquery.bassistance.de/tooltip/lib/jquery.js" type="text/javascript"></script>
<script src="http://jquery.bassistance.de/tooltip/lib/jquery.bgiframe.js" type="text/javascript"></script>
<script src="http://jquery.bassistance.de/tooltip/lib/jquery.dimensions.js" type="text/javascript"></script>
<script src="http://jquery.bassistance.de/tooltip/jquery.tooltip.js" type="text/javascript"></script>
<script src="http://jquery.bassistance.de/tooltip/demo/chili-1.7.pack.js" type="text/javascript"></script>
<script type="text/javascript">
$(function() {
$(‘#set1 *‘).tooltip();
$("#foottip a").tooltip({
bodyHandler: function() {
return $($(this).attr("href")).html();
},
showURL: false
});
$(‘#tonus‘).tooltip({
delay: 0,
showURL: false,
bodyHandler: function() {
return $("<img/>").attr("src", this.src);
}
});
$(‘#yahoo a‘).tooltip({
track: true,
delay: 0,
showURL: false,
showBody: " - ",
fade: 250
});
$("select").tooltip({
left: 25
});
$("map > area").tooltip({ positionLeft: true });
$("#fancy, #fancy2").tooltip({
track: true,
delay: 0,
showURL: false,
fixPNG: true,
showBody: " - ",
extraClass: "pretty fancy",
top: -15,
left: 5
});
$(‘#pretty‘).tooltip({
track: true,
delay: 0,
showURL: false,
showBody: " - ",
extraClass: "pretty",
fixPNG: true,
left: -120
});
$(‘#right a‘).tooltip({
track: true,
delay: 0,
showURL: false,
extraClass: "right"
});
$(‘#right2 a‘).tooltip({ showURL: false, positionLeft: true });
$("#block").click($.tooltip.block);
});
</script>
</head>
<body>
<h1 id="banner">jQuery Tooltip 插件演示</h1>
<div id="main">
<fieldset id="set1">
<legend>三个带有默认设置的 Tooltip 的元素</legend>
<a title="一个带有默认设置的 tooltip,href 显示在标题下" href="http://google.de">链接到谷歌</a>
<br/>
<label title="一个带有 title 和默认设置的标签,没有 href" for="text1">请输入一些字符!</label>
<br/>
<input title="请注意,当点击 input 元素时,tooltip 消失" type="text" value="测试" name="action" id="text1"/>
<h3>代码</h3>
<code class="mix">$(‘#set1 *‘).tooltip();</code>
</fieldset>
<fieldset id="foottip">
<legend>使用 bodyHandler 来显示 tooltip 中的脚注</legend>
一些指向 <a href="#footnote">脚注</a> 的文本。
<br/>
<br/>
<br/>
<br/>
<br/>
<div id="footnote"><em>这里</em>是一个实际的脚注,通过嵌套的 <strong>HTML</strong> 来完成。</div>
<h3>代码</h3>
<code class="mix">$("#foottip a").tooltip({
bodyHandler: function() {
return $($(this).attr("href")).html();
},
showURL: false
});</code>
</fieldset>
<fieldset>
<legend>一个带有 tooltip 的图像</legend>
<img id="tonus" src="http://jquery.bassistance.de/tooltip/demo/image.png" height="80" title="没有延迟。src 值显示在标题下" />
<h3>代码</h3>
<code class="mix">$(‘#tonus‘).tooltip({
delay: 0,
showURL: false,
bodyHandler: function() {
return $("<img/>").attr("src", this.src);
}
});</code>
</fieldset>
<fieldset>
<legend>锁定 tooltip</legend>
<button id="block">点击按钮锁定/解锁所有的 tooltip</button>
<h3>代码</h3>
<code class="mix">$("#block").click($.tooltip.block);</code>
</fieldset>
<fieldset>
<legend>下面四个链接没有延迟跟踪和渐变,带有额外的内容</legend>
<div id="yahoo">
<a title="Yahoo doo - more content" href="http://yahoo.com">链接到雅虎</a>
<a title="Yahoo doo2 - wohooo" href="http://yahoo.com">链接到雅虎 1</a>
<a title="Yahoo doo3" href="http://yahoo.com">链接到雅虎 2</a>
<a title="Yahoo doo4 - buga!" href="http://yahoo.com">链接到雅虎 3</a>
</div>
<select><option>bgiframe test</option></select>
<h3>代码</h3>
<code class="mix">$(‘#yahoo a‘).tooltip({
track: true,
delay: 0,
showURL: false,
showBody: " - ",
fade: 250
});</code>
</fieldset>
<fieldset>
<legend>带有额外的 class 的 tooltip。用于在一个页面上显示不同的 tooltip 样式</legend>
<em>请注意,当鼠标停留在右边视区边界时,右边的那个 tooltip 如何显示一个不同的背景图片。</em>
<br/>
<span id="fancy" title="注意 - 请注意,这里带有一些自定义的样式。">一个奇特的 tooltip,带有一些自定义的样式。</span>
<span id="fancy2" title="注意 - 请注意,这里带有一些自定义的样式。">一个奇特的 tooltip,带有一些自定义的样式。</span>
<p><span id="pretty" title="注意 - 请注意,这里带有更多自定义的样式。">一个奇特的 tooltip,带有阴影和一些额外的内容。</span></p>
<br/>
<br/>
<br/>
<select><option>bgiframe test</option></select>
<h3>代码</h3>
<code class="mix">$("#fancy, #fancy2").tooltip({
track: true,
delay: 0,
showURL: false,
opacity: 1,
fixPNG: true,
showBody: " - ",
extraClass: "pretty fancy",
top: -15,
left: 5
});
$(‘#pretty‘).tooltip({
track: true,
delay: 0,
showURL: false,
showBody: " - ",
extraClass: "pretty",
fixPNG: true,
opacity: 0.95,
left: -120
});</code>
</fieldset>
<fieldset>
<legend>下拉框</legend>
<select title="带有 tooltip 的 select">
<option>1. option</option>
<option>2. option</option>
<option>3. option</option>
</select>
</fieldset>
<fieldset>
<legend>带有 tooltip 的图像地图</legend>
<img id="map" src="karte.png" width="345" height="312" border="0" usemap="#Landkarte">
<map name="Landkarte">
<area shape="rect" coords="11,10,59,29"
href="http://www.koblenz.de/" alt="Koblenz" title="Koblenz">
<area shape="rect" coords="42,36,96,57"
href="http://www.wiesbaden.de/" alt="Wiesbaden" title="Wiesbaden">
<area shape="rect" coords="42,59,78,80"
href="http://www.mainz.de/" alt="Mainz" title="Mainz">
<area shape="rect" coords="100,26,152,58"
href="http://www.frankfurt.de/" alt="Frankfurt" title="Frankfurt">
<area shape="rect" coords="27,113,93,134"
href="http://www.mannheim.de/" alt="Mannheim" title="Mannheim">
<area shape="rect" coords="100,138,163,159"
href="http://www.heidelberg.de/" alt="Heidelberg" title="Heidelberg">
<area shape="rect" coords="207,77,266,101"
href="http://www.wuerzburg.de/" alt="Würzburg" title="Würzburg">
<area shape="rect" coords="282,62,344,85"
href="http://www.bamberg.de/" alt="Bamberg" title="Bamberg">
<area shape="rect" coords="255,132,316,150"
href="http://www.nuernberg.de/" alt="Nürnberg" title="Nürnberg">
<area shape="rect" coords="78,182,132,200"
href="http://www.karlsruhe.de/" alt="Karlsruhe" title="Karlsruhe">
<area shape="rect" coords="142,169,200,193"
href="http://www.heilbronn.de/" alt="Heilbronn" title="Heilbronn">
<area shape="rect" coords="140,209,198,230"
href="http://www.stuttgart.de/" alt="Stuttgart" title="Stuttgart">
<area shape="rect" coords="187,263,222,281"
href="http://www.ulm.de/" alt="Ulm" title="Ulm">
<area shape="rect" coords="249,278,304,297"
href="http://www.augsburg.de/" alt="Augsburg" title="Augsburg">
<area shape="poly" coords="48,311,105,248,96,210,75,205,38,234,8,310"
href="http://www.baden-aktuell.de/" alt="Baden" title="Baden">
</map>
<h3>代码</h3>
<code class="mix">$("map *").tooltip({ positionLeft: true });</code>
</fieldset>
<fieldset>
<legend>在视区的边界测试重新定位</legend>
<p id="right">
带有固定宽度的 tooltip<br/>
<a title="短标题" href="http://google">链接到谷歌</a><br/>
<a title="长标题,没有其他含义,只是一个长标题,一个很长很长很长很长很长的标题" href="http://google">链接到谷歌</a>
</p>
<p id="right2">
带有自动宽度的 tooltip<br/>
<a title="短标题" href="http://google">链接到谷歌</a><br/>
<a title="长标题,没有其他含义,只是一个长标题,一个很长很长很长很长很长的标题" href="http://google">链接到谷歌</a>
</p>
<h3>代码</h3>
<code class="mix">$(‘#right a‘).tooltip({
track: true,
delay: 0,
showURL: false,
extraClass: "right"
});
$(‘#right2 a‘).tooltip({ showURL: false, positionLeft: true });</code>
</fieldset>
</div>
</body>
</html>郑重声明:本站内容如果来自互联网及其他传播媒体,其版权均属原媒体及文章作者所有。转载目的在于传递更多信息及用于网络分享,并不代表本站赞同其观点和对其真实性负责,也不构成任何其他建议。


