Android Bitmap那些事之如何优化内存
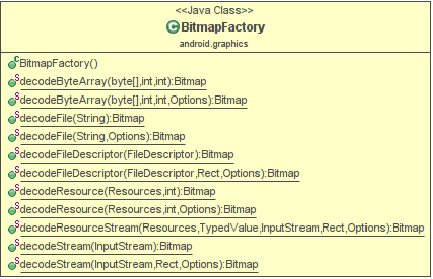
为了节省内存,很多情况下原图片都要经过缩放处理,根据控件的尺寸来处理成对应尺寸的图片,这时使用BitmapFactory创建Bitmap,很多情况下都会使用下面的代码:
|
1
2
3
4
5
6
|
BitmapFactory.Options options = new BitmapFactory.Options();options.inJustDecodeBounds =true;BitmapFactory.decodeResource(getResources(), R.id.myimage, options);int imageHeight = options.outHeight;int imageWidth = options.outWidth;String imageType = options.outMimeType; |
注意上面中的 options . inJustDecodeBounds = true 的inJustDecodeBounds参数,为了避免我翻译的不准确我这里先贴出来google的原文: If set to true, the decoder will return null (no bitmap), but the out... fields will still be set, allowing the caller to query the bitmap without having to allocate the memory for its pixels。用我的话来说就是在decode的时候不给这个bitmap的像素区分配内存,除了这个区别Bitmap的其他信息你都能获取到。这样就有很大的意义,你既没有消耗内存又拿到了图片的信息,为你下一步图片处理提供帮助。
|
1
2
3
4
5
6
7
8
9
10
11
12
13
14
15
16
17
18
19
20
21
22
|
public static int calculateInSampleSize( BitmapFactory.Options options,int reqWidth,int reqHeight){ // Raw height and width of image finalint height = options.outHeight; finalint width = options.outWidth; int inSampleSize =1; if(height > reqHeight || width > reqWidth){ finalint halfHeight = height /2; finalint halfWidth = width /2; // Calculate the largest inSampleSize value that is a power of 2 and keeps both // height and width larger than the requested height and width. while((halfHeight / inSampleSize)> reqHeight &&(halfWidth / inSampleSize)> reqWidth){ inSampleSize *=2; } } return inSampleSize;} |
在decode的时候先设置 options . inJustDecodeBounds = true,获取到图片参数后再设置为false,这就是decode时的技巧,下面就把完整代码贴出来,可以作为工具方法来使用:
|
1
2
3
4
5
6
7
8
9
10
11
12
13
14
15
|
public static Bitmap decodeSampledBitmapFromResource(Resources res,int resId, int reqWidth,int reqHeight){ // First decode with inJustDecodeBounds=true to check dimensions finalBitmapFactory.Options options =newBitmapFactory.Options(); options.inJustDecodeBounds =true; BitmapFactory.decodeResource(res, resId, options); // Calculate inSampleSize options.inSampleSize = calculateInSampleSize(options, reqWidth, reqHeight); // Decode bitmap with inSampleSize set options.inJustDecodeBounds =false; returnBitmapFactory.decodeResource(res, resId, options);} |
上面的方法来自于google官网,没必要进行修改,这就是程序员的拿来主义吧,关键在于要知道为什么这么写。下面是我自己写的一个方法可以直接拿来当工具用。
|
1
2
3
4
5
6
7
8
9
10
11
12
13
14
15
16
17
18
19
20
21
22
23
24
25
26
27
28
29
30
31
|
/** * 对图片进行压缩,主要是为了解决控件显示过大图片占用内存造成OOM问题,一般压缩后的图片大小应该和用来展示它的控件大小相近. * * @param context 上下文 * @param resId 图片资源Id * @param reqWidth 期望压缩的宽度 * @param reqHeight 期望压缩的高度 * @return 压缩后的图片 */ public static Bitmap compressBitmapFromResourse(Context context, int resId, int reqWidth, int reqHeight) { final BitmapFactory.Options options = new BitmapFactory.Options(); /* * 第一次解析时,inJustDecodeBounds设置为true, * 禁止为bitmap分配内存,虽然bitmap返回值为空,但可以获取图片大小 */ options.inJustDecodeBounds = true; BitmapFactory.decodeResource(context.getResources(), resId, options); final int height = options.outHeight; final int width = options.outWidth; int inSampleSize = 1; if (height > reqHeight || width > reqWidth) { final int heightRatio = Math.round((float) height / (float) reqHeight); final int widthRatio = Math.round((float) width / (float) reqWidth); inSampleSize = heightRatio < widthRatio ? heightRatio : widthRatio; } options.inSampleSize = inSampleSize; // 使用计算得到的inSampleSize值再次解析图片 options.inJustDecodeBounds = false; return BitmapFactory.decodeResource(context.getResources(), resId, options); } |
郑重声明:本站内容如果来自互联网及其他传播媒体,其版权均属原媒体及文章作者所有。转载目的在于传递更多信息及用于网络分享,并不代表本站赞同其观点和对其真实性负责,也不构成任何其他建议。


