Nagios配置监控windows客户端
客户端配置:
客户端下载安装NSclient
下载地址:http://nsclient.org/nscp/downloads
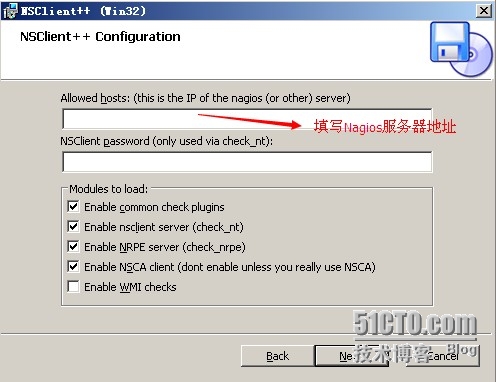
安装NSCP-0.4.1.090-Win32 .msi (本人windows系统为32位,如果是64位系统下载64位安装即可)
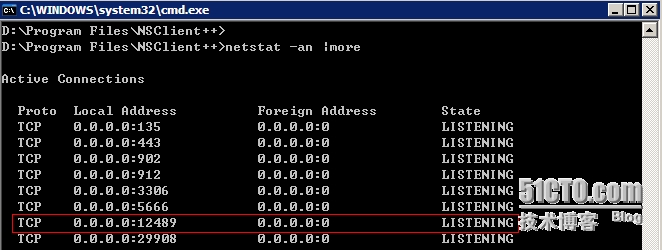
安装完成后运行nscp.exe会自动打开12489端口,用于nagios采集数据
使用netstat -an |more 查看端口是否开启
安装完成后如果要修改Nagios服务器地址, 编辑nsclient安装目录下的nsclient.ini,找到allowed hosts = 192.168.0.54 ,更改hosts后面的ip为nagios服务器的ip就可以了。
服务器端配置:
1. 修改nagios.cfg,加载windows.cfg文件
[root@localhost /]# vi /usr/local/nagios/etc/nagios.cfg
cfg_file=/usr/local/nagios/etc/objects/windows.cfg // 取消这一行的注释
2. 修改windows.cfg文件中host主机的address为被监控主机,其他保持默认(使用默认模版)
★如果更改host_name注意要将下面service里面引用的host_name都统一更改
★如果要增加一台windows监控,在新建一个define host{}进行添加
★如果要添加windows监控的服务,新建一个define serice 进行添加
define host{
use windows-server ; Inherit default values from a template
host_name zrer-win ; The name we‘re giving to this host
alias zrer-windows ; A longer name associated with the host
address 192.168.0.9 ; IP address of the host 被监控主机ip
}
define hostgroup{
hostgroup_name windows-servers ; The name of the hostgroup
alias Windows Servers ; Long name of the group
}
define service{
use generic-service
host_name zrer-win
service_description NSClient++ Version
check_command check_nt!CLIENTVERSION
}
define service{
use generic-service
host_name zrer-win
service_description Uptime
check_command check_nt!UPTIME
}
define service{
use generic-service
host_name zrer-win
service_description CPU Load
check_command check_nt!CPULOAD!-l 5,80,90
}
define service{
use generic-service
host_name zrer-win
service_description Memory Usage
check_command check_nt!MEMUSE!-w 80 -c 90
}
define service{
use generic-service
host_name zrer-win
service_description C:\ Drive Space
check_command check_nt!USEDDISKSPACE!-l c -w 80 -c 90
}
define service{
use generic-service
host_name zrer-win
service_description Explorer
check_command check_nt!PROCSTATE!-d SHOWALL -l Explorer.exe
}
3. 重启nagios服务
[root@localhost /]# service nagios restart
打开Nagios web界面查看监控信息

郑重声明:本站内容如果来自互联网及其他传播媒体,其版权均属原媒体及文章作者所有。转载目的在于传递更多信息及用于网络分享,并不代表本站赞同其观点和对其真实性负责,也不构成任何其他建议。


