安卓开发学习随笔 (1)屏幕滚动相关
做的opencv项目要涉及到,人脸检测之后的数据传给屏幕滚动的接口
所以这里研究一下屏幕滚动相关的东西
转自:http://blog.csdn.net/manoel/article/details/7579124
ScrollView是一种特殊的FrameLayout,使用ScrollView可以使用户能够滚动一个包含views的列表,这样做的话,就可以利用比物理显示区域更大的空间。有一点需要注意一下,那就是ScrollView只能包含一个子视图view或ViewGroup(这个ViewGroup通常是LinearLayout)。
不要混合使用ListView和ScrollView。ListView被设计用来显示一些相关的信息,同时,ListView也已经被优化了去显示大量的列表lists。
下面的main.xml显示了一个包含LinearLayout的ScrollView,在LinearLayuout中又包含了一些Button和EditText视图:
- <?xml version="1.0" encoding="utf-8"?>
- <ScrollView xmlns:android="http://schemas.android.com/apk/res/android"
- android:layout_width="fill_parent"
- android:layout_height="fill_parent" >
- <LinearLayout
- android:layout_width="fill_parent"
- android:layout_height="wrap_content"
- android:orientation="vertical" >
- <Button
- android:id="@+id/button1"
- android:layout_width="fill_parent"
- android:layout_height="wrap_content"
- android:text="Button1" />
- <Button
- android:id="@+id/button2"
- android:layout_width="fill_parent"
- android:layout_height="wrap_content"
- android:text="Button2" />
- <Button
- android:id="@+id/button3"
- android:layout_width="fill_parent"
- android:layout_height="wrap_content"
- android:text="Button3" />
- <EditText
- android:id="@+id/txt"
- android:layout_width="fill_parent"
- android:layout_height="600dp" />
- <Button
- android:id="@+id/button4"
- android:layout_width="fill_parent"
- android:layout_height="wrap_content"
- android:text="Button4" />
- <Button
- android:id="@+id/button5"
- android:layout_width="fill_parent"
- android:layout_height="wrap_content"
- android:text="Button5" />
- </LinearLayout>
- </ScrollView>
以上代码在模拟器上的效果图:
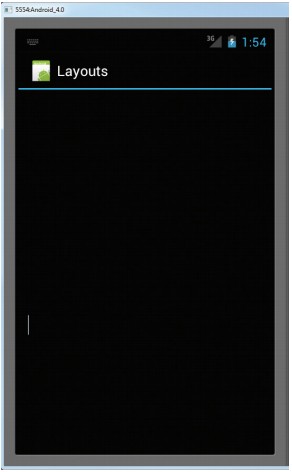
因为EditText自动获得了焦点,它充满了整个activity(因为它的高度被设置成了600dp)。如果想阻止这个EditText获得焦点,那么只需在<LinearLayout>元素中添加以下两个属性:
- <LinearLayout
- android:layout_width="fill_parent"
- android:layout_height="wrap_content"
- android:orientation="vertical"
- android:focusable="true"
- android:focusableInTouchMode="true"
- >
现在,就可以看到那些button按钮视图了,同时也可以滚动这些视图列表。就像下面展示的那样:
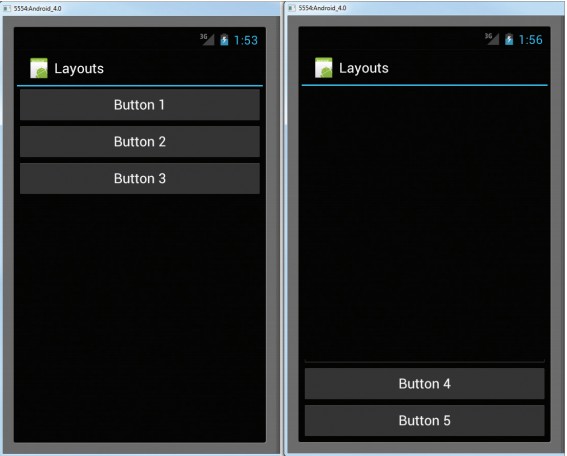
但是有的时候可能想要这个EditText自动获取焦点,但是又不想软键盘自动地显示出来。想要阻止软键盘的出现,可以在AndroidManifext.xml中的<activity>节点中,添加如下的属性:
- <activity
- android:name=".LayoutActivity"
- android:label="@string/app_name"
- <!-- 注意这行代码 -->
- android:windowSoftInputMode="stateHidden"
- >
- <intent-filter>
- <action android:name="android.intent.action.MAIN" />
- <category android:name="android.intent.category.LAUNCHER" />
- </intent-filter>
- </activity>
Android的Activity屏幕切换动画(一)-左右滑动切换
转自:http://www.oschina.net/question/97118_34343
这段时间一直在忙Android的项目,总算抽出点时间休息一下,准备把一些项目用到的Android经验分享一下。
在Android开发过程中,经常会碰到Activity之间的切换效果的问题,下面介绍一下如何实现左右滑动的切换效果,首先了解一下Activity切换的实现,从Android2.0开始在Activity增加了一个方法:
public void overridePendingTransition (int enterAnim, int exitAnim)
其中:
enterAnim 定义Activity进入屏幕时的动画
exitAnim 定义Activity退出屏幕时的动画
overridePendingTransition 方法必须在startActivity()或者 finish()方法的后面。
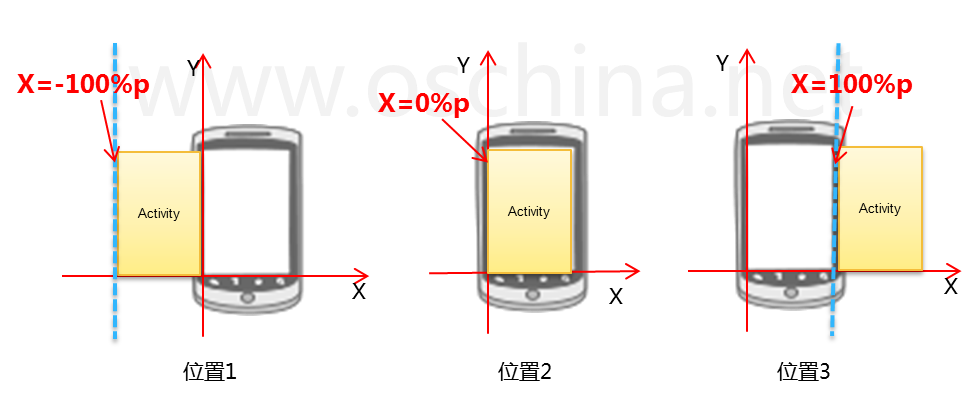
Android已经内置了几种动画效果,可以见 android.R.anim 类。一般情况下我们需要自己定义屏幕切换的效果。首先我们先了解Activity的位置定义,如下图:
从上图可以看出,以手机屏幕下面边未X轴,屏幕左边为Y轴,当Activity在X轴值为-100%p时,刚好在屏幕的左边(位置1),当X轴值为0%p时,刚好再屏幕内(位置2),当X=100%p时刚好在屏幕右边(位置3)。
清楚了位置后,我们就可以实现左右滑动的切换效果,首先让要退出的Activity从位置2移动到位置1,同时让进入的Activity从位置3移动位置2,这样就能实现从左右切换效果。
实现过程如下,首先定义2个动画,在 res目录创建anim目录, 然后在目录创建动画的xml文件:out_to_left.xml (从左边退出动画) 、in_from_right.xml(从右边进入动画)
out_to_left.xml (从 位置2 移动到 位置1)
1 |
<?xml version="1.0" encoding="utf-8"?> |
2 |
<set xmlns:android="http://schemas.android.com/apk/res/android" android:interpolator="<a href="http://my.oschina.net/asia" class="referer" target="_blank">@android</a> :anim/accelerate_interpolator"> |
3 |
<translate android:fromXDelta="0%p" android:toXDelta="-100%p" |
4 |
android:duration="500" /> |
5 |
</set> |
in_from_right.xml (从 位置3 移动到 位置2)
1 |
<?xml version="1.0" encoding="utf-8"?> |
2 |
<set xmlns:android="http://schemas.android.com/apk/res/android" android:interpolator="<a href="http://my.oschina.net/asia" class="referer" target="_blank">@android</a> :anim/accelerate_interpolator"> |
3 |
<translate android:fromXDelta="100%p" android:toXDelta="0%p" |
4 |
android:duration="500" /> |
5 |
</set> |
注: android:fromXDelta 动画开始的位置, android:toXDelta 动画结束的位置, android:duration动画的时间。
Android 代码如下:
01 |
public class LeftRightSlideActivity extends Activity { |
02 |
@Override |
03 |
public void onCreate(Bundle savedInstanceState) { |
04 |
super.onCreate(savedInstanceState); |
05 |
setContentView(R.layout.main); |
06 |
|
07 |
Button button = (Button)findViewById(R.id.button1); |
08 |
button.setOnClickListener(new View.OnClickListener() { |
09 |
@Override |
10 |
public void onClick(View v) { |
11 |
Intent intent = new Intent(); |
12 |
intent.setClass(LeftRightSlideActivity.this, SlideSecondActivity.class); |
13 |
startActivity(intent); |
14 |
//设置切换动画,从右边进入,左边退出 |
15 |
overridePendingTransition(R.anim.in_from_right, R.anim.out_to_left); |
16 |
} |
17 |
}); |
18 |
} |
19 |
} |
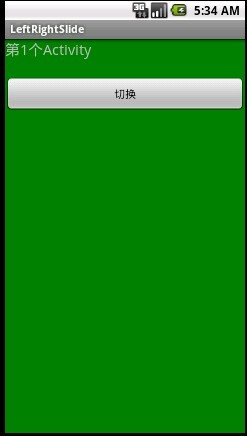
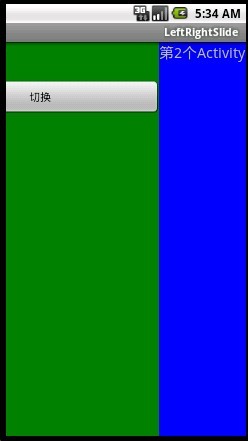
效果图如下:
虽然左右滑动切换的实现很简单,但是对于原理的理解很重要,掌握了原理可以充分发挥想象力设计出各种各样的动画效果,希望对一些入门的新手有帮助。
以后在慢慢整理一些项目中用到的切换动画效果。
(好像没地方上传附件,所以就没有把工程放上来)
郑重声明:本站内容如果来自互联网及其他传播媒体,其版权均属原媒体及文章作者所有。转载目的在于传递更多信息及用于网络分享,并不代表本站赞同其观点和对其真实性负责,也不构成任何其他建议。


