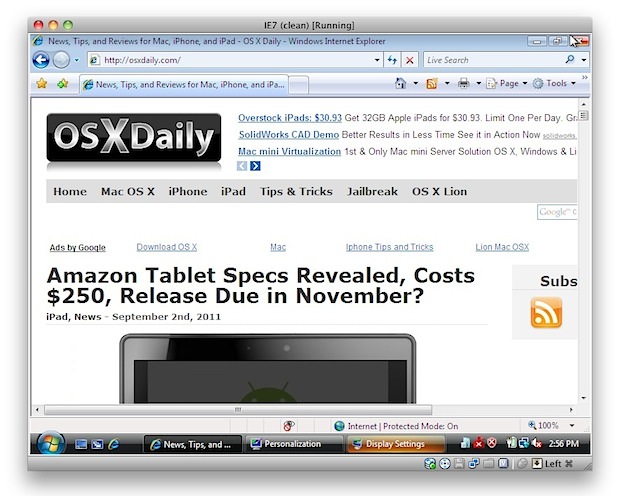
Internet Explorer for Mac the Easy Way: Run IE 7, IE8, & IE9 Free in a Virtual Machine

If you’re a Mac user that requires the usage of Internet Explorer under Mac OS X, you’ll find your choices are generally as follows: run IE on top of Mac OS X with Wine which can be slow and buggy, dual boot Windows and Mac OS X which is a nuisance because it requites rebooting, or use virtualization with something like Parallels, VMWare, or VirtualBox. Virtualization is generally the best method because you can run IE and other Windows apps directly atop OS X, but some of the VM software is expensive and you still need a Windows license key, right? Wrong!
Run Internet Explorer 7, 8, 10, & 11 in Mac OS X the Easy & Free Way
We’re going to walk you through how to install Internet Explorer 7, 8, 9, 10, and 11 in a virtual machine running Windows, directly in Mac OS X – for free. This is achieved by using the freely available VirtualBox software from Oracle, and combining that with free Internet Explorer testing virtual machines from Microsoft, the trick is converting these free IE vm’s so that they work flawlessly under OS X (or Linux, technically), and that is all handled automatically with this method.
Notes: the admin password for all of the IE VMs is “Password1″ without the quotes. This has been tested and confirmed to work with all modern versions of Mac system software including OS X 10.10 Yosemite, OS X 10.9 Mavericks, 10.8 Mountain Lion, OS X 10.7 Lion, and Mac OS X 10.6 Snow Leopard.
Installation size per IE Virtual Machine is about 11GB, to install all Windows VM’s it will take about 48GB of disk space.
- Download & Install VirtualBox – Download Now (direct .dmg download link) – or visit VirtualBox Downloads page
- Launch the Terminal (located in /Applications/Utilities/)
- Decide which versions of Internet Explorer you want to download and install – each version of Internet Explorer is contained within a separate virtual machine that runs within VirtualBox. In other words, if you want to run Internet Explorer 7, 8, and 9, you will need to download three separate VM’s, which may take a while so keep that in mind. Select the text below and copy it:
-
Install ALL versions of Internet Explorer: IE7, IE 8, IE 9, IE10, IE11
curl -s https://raw.githubusercontent.com/xdissent/ievms/master/ievms.sh | bash
-
Install Internet Explorer 11 Only
curl -s https://raw.githubusercontent.com/xdissent/ievms/master/ievms.sh | IEVMS_VERSIONS="11" bash
-
Install Internet Explorer 10 Only
curl -s https://raw.githubusercontent.com/xdissent/ievms/master/ievms.sh | IEVMS_VERSIONS="10" bash
-
Install Internet Explorer 7 Only
curl -s https://raw.github.com/xdissent/ievms/master/ievms.sh | IEVMS_VERSIONS="7" bash
-
Install Internet Explorer 8 Only
curl -s https://raw.github.com/xdissent/ievms/master/ievms.sh | IEVMS_VERSIONS="8" bash
-
Install Internet Explorer 9 Only
curl -s https://raw.githubusercontent.com/xdissent/ievms/master/ievms.sh | IEVMS_VERSIONS="9" bash
- Copy and paste the selected command from above into the Terminal and hit return, this will start the download and conversion process. How long this takes depends on your internet connection and how many versions of Internet Explorer you chose to install
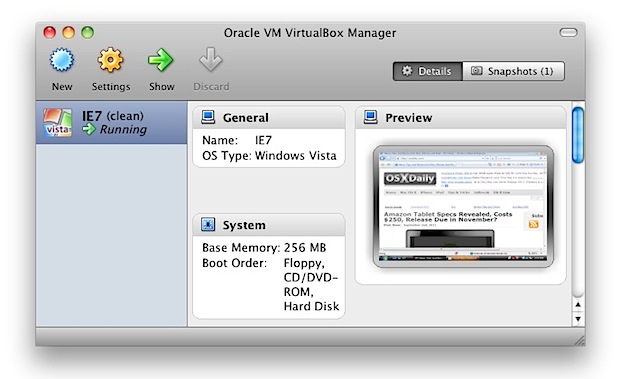
- Launch VirtualBox and boot Windows & Internet Explorer – select the virtual machine corresponding to the version of Internet Explorer you intend to use: IE7, IE8, IE9, then click on the “Start” button to boot that Windows machine with that version of Internet Explorer.
Remember that the default Windows admin password is “Password1″, it’s also the password hint within the VM should you forget it.

That’s really all there is to it. These commands are part of the ievsms script from xdissent and it manages the entire download, conversion, and installation procedure, it doesn’t get much easier.
Note: if you’re having trouble with the above URL or commands not working, it may be because github changed the URL structure of their source from github.com to githubusercontent, like the following:
curl -s https://raw.github.com/xdissent/ievms/master/ievms.sh | bash
Turns into:
curl -s https://raw.githubusercontent.com/xdissent/ievms/master/ievms.sh | bash
Note the URL change from github to githubusercontent, otherwise everything else is the same. (Thanks Blair!)
VM Snapshots Circumvent Microsofts 30 Day Limitation
The other great thing about this method is that it circumvents
Microsofts 30 day limitation by utilizing snapshots, a feature built
into VirtualBox. This preserves the original Windows VM state and allows
you to continuously use the IE virtual machine without any time
limitation simply by reverting to the original snapshot once the 30 day
lock occurs.
To use a snapshot after the 30 day Windows expiration, just open VirtualBox, select the IE VM, and click on the “Snapshots” button. From here you can boot from the original snapshot that was created and use IE again for another 30 days. You can do this indefinitely, effectively having a clean IE test environment forever.
What about IE 6?
IE6 is being rapidly abandoned as usage dies, but if you need to use it then you can follow this guide to get IE6 running in Mac OS X.
Getting it working isn’t quite as easy as the virtual machine methods
above and it utilizes a wine based emulator so your mileage may vary.
Why Use Internet Explorer on a Mac?
This has been a common question, but the primary reasons that Mac users
need Internet Explorer are either for web development and web app
compatibility purposes, or to access certain web sites or apps that
require the use of IE to gain access. If you’re not in either of those
groups, there isn’t much benefit to getting IE in Mac OS X, since
Safari, Chrome, and Firefox are all excellent browser choices with
significantly better performance on the Mac.
郑重声明:本站内容如果来自互联网及其他传播媒体,其版权均属原媒体及文章作者所有。转载目的在于传递更多信息及用于网络分享,并不代表本站赞同其观点和对其真实性负责,也不构成任何其他建议。


